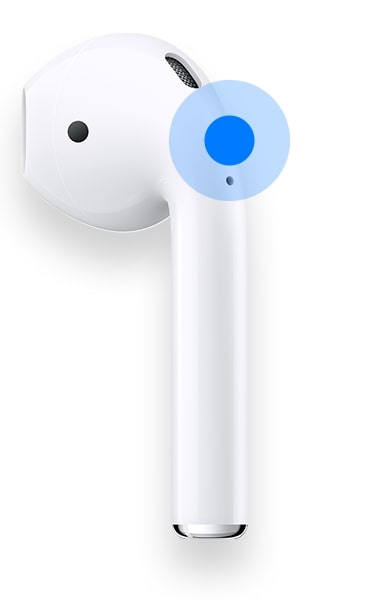
Squeezing the earphones’ stems and using voice commands are all ways to interact with your AirPods Pro. By pressing the stems, you can adjust the volume, take calls, and switch noise cancellation modes on your AirPods Pro.
When used in conjunction with an iPhone, the AirPods Pro provide even more customization options. The design of AirPods is quite basic; there are no buttons, and they are no bigger than the top bit of your finger. A beginner could mistake them for worthless pieces of plastic.
However, AirPods, particularly AirPods Pro, are equipped with many functions, some of which are really impressive.
Learn how to use the many features and settings on your AirPods Pro and access their full potential with this comprehensive guide on AirPod Pro controls.
AirPod Pro Controls
AirPod Pro Controls are easy-to-use once you get the hang of it. Every AirPod Pro has a force sensor that makes it simple to control playback, stop, skip songs, answer/end calls, and more. The stem can be pressed once to start/stop playback or to answer a call. To skip forward two times, press the stem twice. To go back three steps, push the stem three times. You may toggle between Noise Cancellation and Transparency by pressing and holding the button.
How to Use AirPod Pro Basic Controls
Despite lacking physical buttons, the AirPods may still be used in many ways.
To use a feature, for instance, you had to double-tap it on the first and second-generation AirPods. However, this is only useful for a specific purpose (such as playing and pausing music), so you will still need to use your phone for the majority of the controls.

Because of this, Apple developed the force sensor. This allows the user to trigger several features without manually pressing any buttons. This new feature was first included in the AirPods Pro and is now standard on all AirPods models (3rd Gen).
Below we give you a rundown of basic controls on your AirPods Pro:
Playing/Pausing on AirPods Pro
The force sensor, a tiny touchpad included inside the AirPods Pro’s stem, is the primary interface for most of the device’s fundamental functions.
To activate the force sensor, just give the stem a little squeeze. No action will be taken on a tap alone.
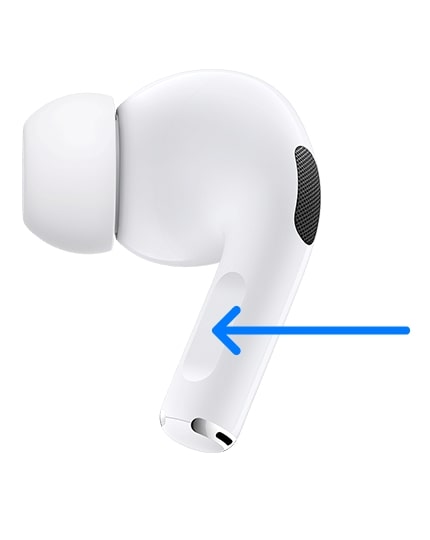
The notch in each stem indicates the location of the force sensor. The results of pressing vary with the frequency with which they are performed.

Pressing Once: A single squeeze of the stem will start or stop the current playback. Squeezing the device once will answer a call.
Pressing Twice: To move along in your playlist, just press the stem twice. Double-pressing will only accomplish something if the app recognizes the gesture. If you are on a call and you want to reject the call and send the caller to voicemail, press twice.
Pressing Thrice: Three presses of the stem will take you back to the current song’s beginning or the end of the previous one. However, pressing the earbuds three times will only accomplish the desired action if your app supports this feature.
Activating Siri on AirPods Pro
Even without AirPods, activating Siri is simple. New capabilities are available after setting up your AirPods Pro.
To begin, speaking “Hey Siri” out loud will wake Siri on your AirPods, and then you may proceed to speak your request. Say something like, “Hey Siri, what’s the temperature like today?” if you’re curious.
Siri may also be instructed to read incoming messages aloud while the user has their AirPods Pro. Launch the Settings app and choose Notifications, followed by Announce Notifications.
When activated and paired with AirPods, Siri will read any incoming text message aloud, including messages from a wide range of third-party messaging applications.
Additionally, your AirPods will listen for a couple of seconds after Siri concludes reading the message so you may answer. Say “Reply” to Siri, and then say anything you want Siri to repeat back to you.
Noise Cancellation Control
Noise Cancellation is a standout feature of the AirPods Pro. A tiny microphone in each earbud takes ambient noise and muffles it using “anti-noise.” This feature is invaluable if you need to concentrate while using your AirPods.
You also get Transparency mode. Instead of blocking out ambient noise, Transparency mode makes it easier to listen to your music without removing your earphones by leveraging the microphones. It’s great for when you want to be aware of your surroundings.
Using the AirPods Pro Control to toggle between Noise Cancellation and Transparency Mode: To toggle between the AirPods Pro’s Noise Cancellation and Transparency modes, just press and hold the stem. When the transaction is complete, you’ll hear a faint chime.
Another way to toggle between the two is to open your iPhone’s Control Center, press and hold the volume meter, and then tap the Noise Control option.
You also have an option that just disables the microphone on the AirPods Pro, rendering the device incapable of using either the Noise Cancellation or Transparency settings.
Enable Spatial Audio
Open the Control Center on your iPhone, press and hold the volume meter, and then touch the Spatial audio icon at the bottom of the screen to activate spatial audio.
Both Fixed and Head Tracked spatial audio modes may be activated in this menu. When you choose the fixed mode, the sound will come from all directions but will be uniform in quality.
With Head Tracked enabled, the sound will adapt to the listener’s head movements, simulating the effect of listening to a single speaker directly in front of you. You may also turn it off if you prefer regular stereo.
Turning the Volume Up and Down with AirPods Pro Controls
Changing the volume on your AirPods Pro is just as easy as it was on previous AirPods models. While adjusting the volume on your AirPods, the first thing is to ensure that they are paired with your phone through Bluetooth. Once your AirPods are synced with your iPhone, you may adjust the volume by swiping down from the notification shade and using the volume widget in the Control Center.
You can also tweak the volume on your AirPods Pro by dragging the volume slider in the Now Playing widget of your lock screen on your iPhone.
The Apple Watch and the iPhone’s lock screen both allow you to control the AirPods’ volume. The watch’s lock screen will also show the title, artist, and duration of the currently playing music on your iPhone.
You can also use the volume slider on all music apps for volume adjustments. If you’re using an Apple Watch, you can click on the widget and adjust the device’s volume controls by rotating the Digital Crown.
If you own an AirPods Pro 2, you can control the volume by putting your thumb on the AirPods’ stem and swiping your index finger up or down on the Touch control to increase or decrease the volume.
Call Controls on AirPods Pro
AirPods Pro allows you to take calls and accept or reject them.
- The call is answered with a single touch or squeeze of the stem.
- Squeezing the stem twice will decline the call.
- After picking up the call, you may terminate it with a simple push or squeeze of the stem.
Unlike many other earbuds, the AirPods Pro includes gesture controls to execute functions, and each one has been improved upon using either hardware or software. By illustration, the superior haptic engine housed inside the stems provides a satisfying click upon physical contact. When you swipe, it will feel and sound as if you flipped a real switch.
How To Customize AirPod Pro Controls
In addition to renaming your earbuds and adjusting their tap sensitivity, the AirPods Pro’s settings allow you to choose which noise cancellation modes you’d want to cycle through by pressing and holding each stem.
Changing left and right AirPods Pro Force Sensors
- Go to Settings > Bluetooth on your iPhone.
- After ensuring your AirPods Pro are connected, Tap the “i” option next to your AirPods name.
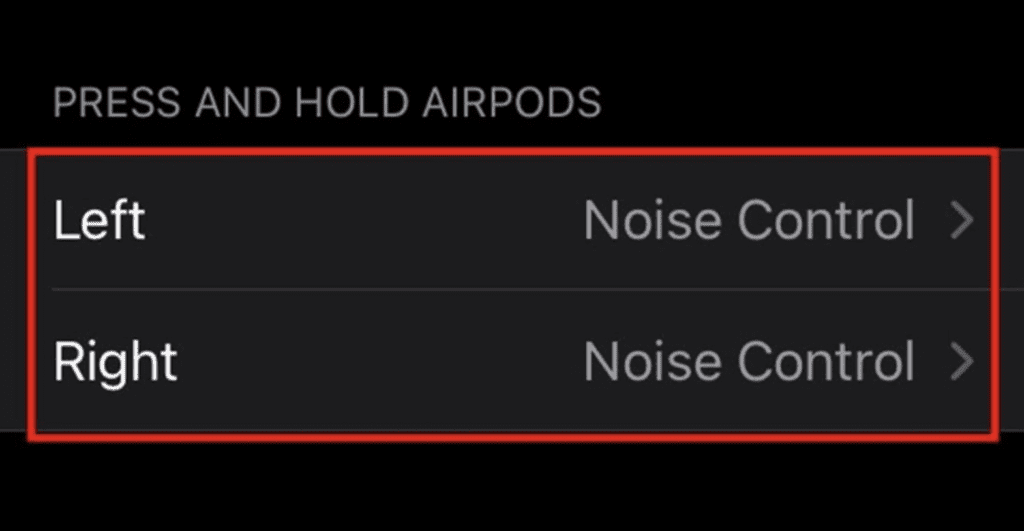
- Below the option “Press and Hold AirPods,” choose Left or Right as per your preference.
- You can also customize what functions can be activated with AirPods Force Sensor.
- Alternatively, you can also switch off the Noise Control controls.

Adjusting Press Speed and Press and Hold Duration on AirPods Pro stems
- On your iPhone, open Settings > Accessibility.
- Now, scroll down and then tap AirPods.
- You will now find an option to adjust the Press Speed and Press and Hold Duration by selecting any option other than the default.
Frequently Asked Questions
Here are some of the most commonly asked questions about AirPods Pro Control.
Can you control the volume with AirPods Pro?
On AirPods Pro 2nd gen, you have the swipe gesture for controlling the volume from AirPods earbuds by swiping down and up on the stem. You cannot control the volume of the 1st Gen AirPods Pro the same way; you will have to adjust the volume on your paired device like an iPhone. If you use Siri, you can use voice commands like “Turn down the volume.”
Does AirPods Pro have double-tap feature?
No, the AirPods Pro do not support the double-tap feature. To skip tracks and move on to the next one in the playlist, you have to use the squeeze controls we’ve mentioned above.
Conclusion
The Apple AirPods Pro has a more advanced design, but it’s still simple to use. The AirPods’ built-in force sensor allows you full control of your listening experience without pulling out your phone at any time.
We hope this guide about AirPod Pro controls has shed some light on the AirPods Pro Controls and the ease with which your listening experience may be tailored to your preferences.
Is there anything we overlooked? Let us know in the comments below.