When Siri takes over your AirPods and starts reading you a stream of text messages instead of letting you enjoy your favorite podcast or music, it can be really frustrating. Siri can now broadcast alerts from iMessage, Reminders, and third-party applications directly to you. As a bonus, you can now respond to notifications without using your hands.
It’s a great idea, in principle, but it might be annoying in practice if you get a lot of alerts in one go. Even though it is disabled by default, you may have inadvertently activated it while connecting new AirPods (or Beats) or updating to iOS 15.
If you have no clue how to stop Siri from reading messages on AirPods, we’ve got your back. In case this tutorial piques your interest enough to activate the function, we’ll also show you how to do that.
How to Stop Siri From Reading Messages on AirPods
If you are wondering how to stop AirPods from reading texts, it’s a pretty simple procedure to turn off Siri’s access to texts. Follow the instructions below to restrict Siri from reading messages on your AirPods.
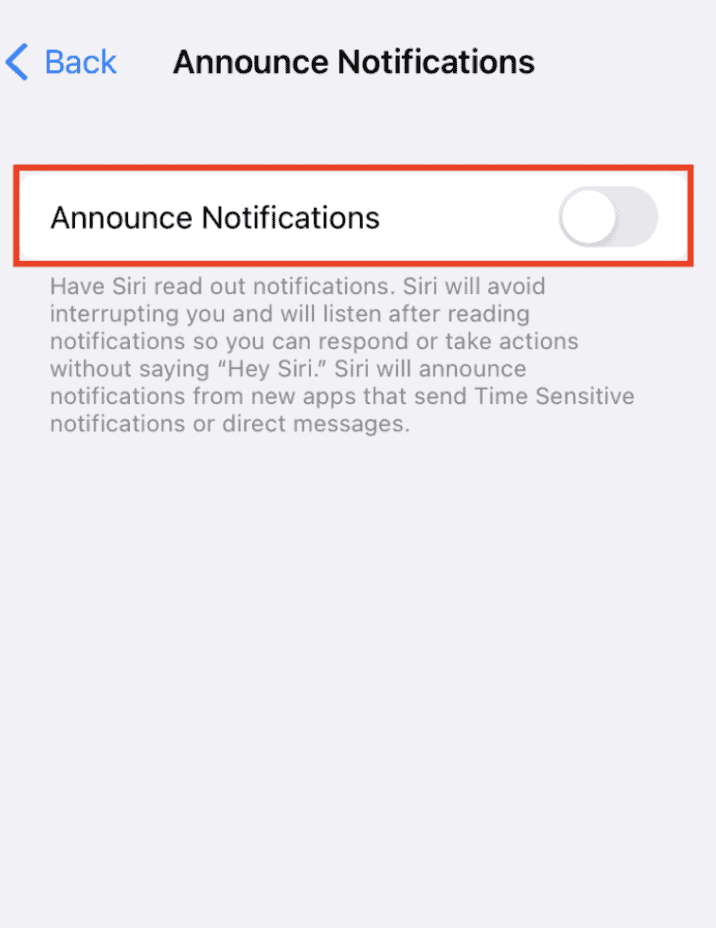
- On your iPhone or iPad, go to Settings > Notifications > Announce Notifications.
- Tap Messages.
- Select either Time Sensitive, Direct Messages, or All Notifications.
- Disable the Announce Notification feature by toggling it off or disable the option “Siri can read out notifications when supported headphones are connected.”
Once you disable Announce Notification by following the instructions above, Siri will stop informing you of notifications and interrupting your AirPods playback.
How to Customize Notifications on AirPods
If you want to further customize the announcements, under the “Announce When Connected To” option, you may disable just the Headphones option if you don’t want to disable the function altogether. Siri will instead only be used for CarPlay alerts (if your car supports it).
Here’s a video guide to doing this:
AirPods and other devices compatible with the Announce Notifications feature
Announce Notifications are only available on certain AirPods models. If you can’t locate the option to “Announce Notifications” on your iPhone, check to see whether your AirPods or Beats are compatible with the feature. Additionally, you need to be on iOS 15 or later and iPadOS 15 or later to use this feature.

Here is a list of AirPods and Beats compatible with Announce Notification feature:
- AirPods Max
- AirPods (2nd generation)
- AirPods Pro
- AirPods 3
- Powerbeats
- Powerbeats Pro
- Beats Solo Pro
How to Stop AirPods From Reading Texts
You can also customize Siri to stick to just the apps and notifications you choose, ensuring you only get important alerts. If you don’t want to turn off the function completely, you may do this instead. Learn how to stop AirPods from reading texts from specific apps below.

How to stop Siri from reading notifications on AirPods from specific apps
Follow the steps below to select specific apps from which Siri can read notifications and announce them on your AirPods. This gives you complete control over the feature, and you can use it to your advantage.
- On your iPhone/iPad, open the Settings menu and go to Notifications.
- Now tap on Siri and then select Announce Notifications.
- Look for the option ‘Announce Notifications From’ and tap on it.
- Now, you will get a list of compatible apps with this feature. Toggle off the apps that you don’t want Siri to access for reading messages and toggle on the ones you want.
For apps like Instagram, you also get to use the feature partially. For example, you can set it only for announcing when you get a direct message notification and not any other notification like someone commenting or liking your Post, Story, or Reel.
How to Temporarily Stop Siri Reading Out Your Messages
If you sometimes utilize the Announce Messages function, turning it off entirely may not be the best idea. Maybe you like having Siri read your Apple Watch messages while you’re out on a stroll, but you’d rather not have her do it during a workout when you need all your attention on the task at hand.
You may temporarily turn off Announce Messages using one of the methods shown below. Siri will stop reading your messages unless you switch on the Announce Messages function again.
How to stop Siri from reading messages for 1 hour or more
- First, ensure “Announce Notifications” is turned on by navigating to Settings > Siri & Search > Announce Notifications.
- Next, on your iPhone/iPad, go to Settings > Control Center. Tap the Add (+) icon next to the “Announce Messages with Siri” option to add it to the Control Center.
- Now, quickly open the Control Center on your Apple device and tap and hold the “Announce Messages with Siri” option to mute for 1 hour or more.
How to Stop Siri from Reading Messages on AirPods using Apple Watch
AirPods can also be used with an Apple Watch, making them useful even when you don’t have your iPhone on you. Thankfully, you can also turn off Siri’s Announce Notifications on your Apple Watch, and it works the same way as the previous method (via the Control Center).

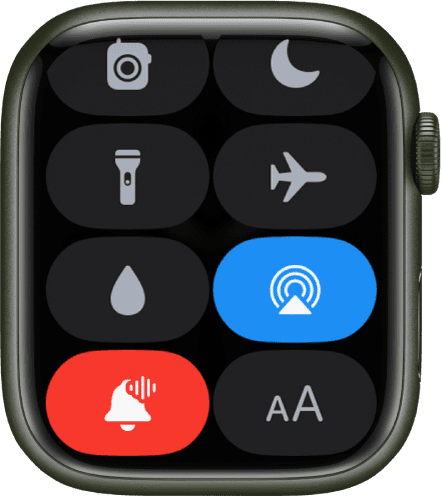
A bottom-up swipe will bring up the Apple Watch’s Control Center. To disable Siri’s announcement of your messages, press the icon of a bell with a waveform in the corner. Note that you won’t see this icon if you don’t have your AirPods in your ears.
You may also deactivate Announce Messages for an hour or the full day by tapping and holding the symbol, which will bring up the choice. No matter which timeout you choose, Announce Notifications will restart automatically when the allotted time has passed.
How to disable Siri reading messages using Apple Watch
- Open the Settings app on your Apple Watch using the digital crown.
- Now, go to Notifications.
- Scroll down and disable Announce Notifications.
How do you reply to an Announced Message with Siri?
After Siri has completed reading you an Announced Message, it will remain attentive and await your command to “respond,” at which point it will transcribe your words into a text message.
What occurs next is determined by the preferences you provide. Turning on Reply Without Confirmation will immediately send your dictated message without asking for your approval. If the “Reply Without Confirmation” option is disabled, Siri will read your response aloud and ask if you’re sure before sending the message.
Frequently Asked Questions
Here are some of the most commonly asked questions about the Announcement feature:
Can Siri read out specific notifications only?
Yes! You may tell Siri to exclusively broadcast phone calls or alerts from a specific app.
Can I reply to notifications directly via the AirPods?
Indeed. You can reply to notifications using voice commands via your AirPods. For every message played out loud by your AirPods, you can reply with a voice command and dictate the message.
Conclusion
We hope this guide helps you figure out how to stop Siri from reading messages on AirPods. Although innovative and, at times, handy, many users find this feature annoying, especially when they are listening to their favorite music or audiobook.
Is Siri’s ability to read out loud texts a feature you use often? If so, do you use it all the time or temporarily? Let us know in the comments!