A malfunctioning AirPod can be pretty frustrating. However, this article highlights the reasons why you might be experiencing this problem and step-by-step instructions on how to fix it.
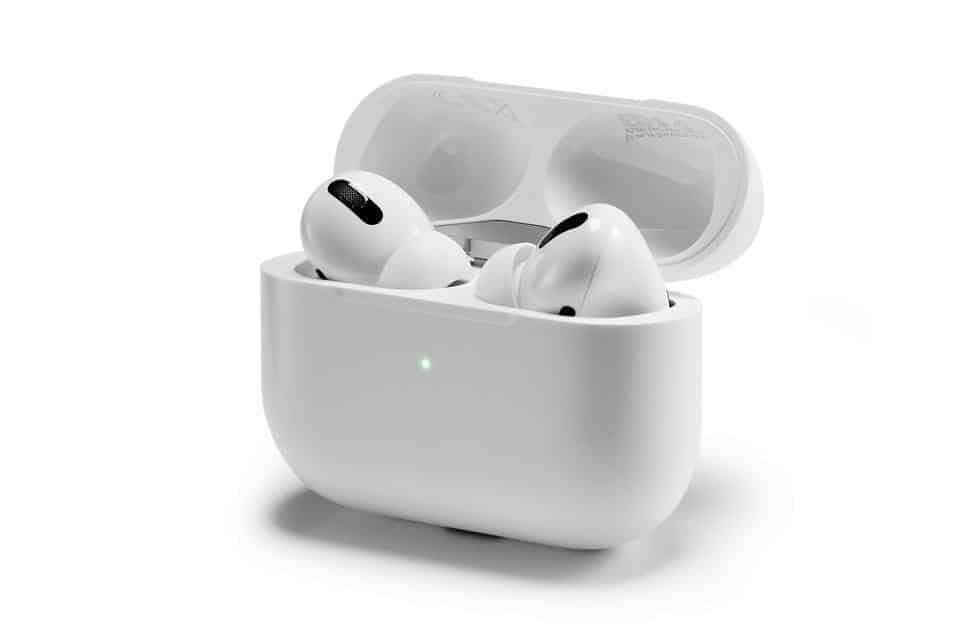
During the iPhone 7 event, Apple announced its rather insane plan to boldly take out the headphone jack, thus unveiling the AirPods. After months of expectation and delay, Apple finally delivered its first pair of AirPods in late 2016, bundled with a charging case and lightning to USB-A cable.
Although the initial design faced some criticism, the AirPods’ ease of use and broad compatibility with Apple’s extensive ecosystem set them up for success. Apple’s W1 processor made the earphones quite powerful, eliminating Bluetooth’s flakiness.
While AirPods are compatible with non-Apple devices, they perform best on other Apple products such as iPhones, iPads, and Macs. Apple now offers three types of AirPods: AirPods, AirPods Pro, and AirPods Max, all of which are available on Amazon for less than other retailers, typically, including the Apple Store itself. However, regardless of which model you have, the AirPods may refuse to charge for various reasons.
AirPods wireless earphones come with two separate left and right earpieces in one single unit. Some users have reported that their right-side AirPod has stopped working or is severely underperforming.
So why is your Right AirPod not charging?
After reading this article, you should be able to fix your AirPod or decide to either replace or dispose of your unit all together.
Right AirPod Not Charging
If you find your right AirPod not charging, use your iPad or iPhone to check whether both AirPods are charging. If the right Airpod is not charging, remove the foam ear tip, clean the AirPod and charging case and see whether it starts charging.

Over the years, Apple has changed wireless connectivity through their AirPods line with incredible sound and a seamless connectivity experience. The features keep improving, as illustrated in the table below.
| Features | AirPods (3rd generation) | AirPods Pro | AirPods Max |
|---|---|---|---|
| Active Noise Cancellation | No | Yes | Yes |
| Transparency Mode | No | Yes | Yes |
| Sweat and Water Resistant | Yes | Yes | No |
| H1 Chip | Yes | Yes | Yes |
| Charging | MagSafe Charging Case | MagSafe Charging Case | Smart Case |
| Hours | Up to 6 hours of listening time on one charge | Up to 4.5 hours of listening time on one charge | Up to 20 hours of listening time on one charge |
| Automatic Switching | Yes | Yes | Yes |
| Personalized Engraving | Yes | Yes | Yes |
How to Fix Your Right AirPod Not Charging
AirPods are great–except when they are not working!
When the left AirPod is charging and the right one is not, something is wrong. The reasons vary, ranging from simple fixes like a low battery or dirty buds to more complex issues like audio settings or network problems.
Whatever the case might be, It is possible to find a quick solution, and you’ll be back to listening to your favorite tracks or podcasts in no time.
Step 1: Check Battery Level on Charging Case

A dead battery is the most likely and simplest reason for your right AirPod not charging.
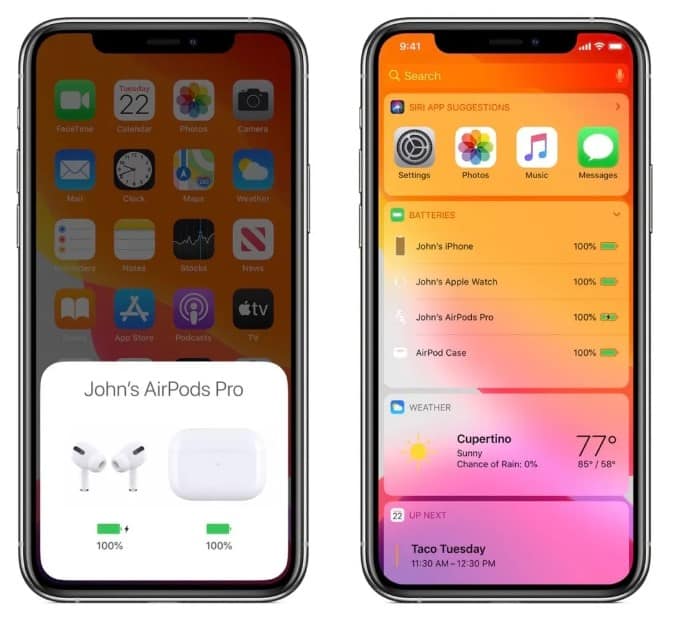
Because AirPods consume batteries at various rates, even if you charge them both simultaneously, one may run out of power first. Check the battery life of your AirPods or glance at your battery widget to see whether you need to charge them.
To check the battery percentage, open the case lid with both your AirPods inside and hold it close to your phone. After a few seconds, you should see an animated pop-up at the bottom of your screen with the charge status of the AirPods and charging case.
On your Mac:
- Open the case lid and take out your AirPods
- Locate the menu bar and click on the Bluetooth Icon
- Hover the cursor over your AirPods
Step 2: Check Charging Cable
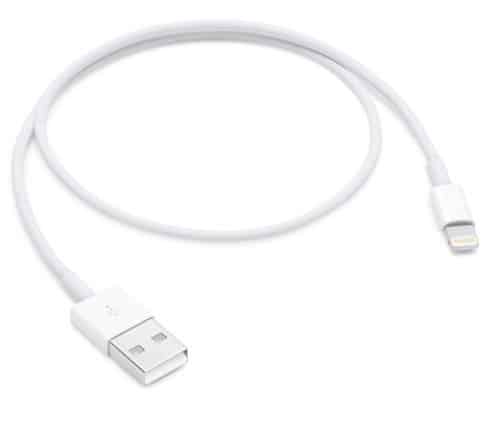
If your AirPods are not charging, the problem might lie with the charging cable. If you are using wired charging, the problem might be that the charging cable is not inserted correctly, and if you are charging wirelessly, the problem might lie with the charging case not making direct contact with the charging base.
Take the charging cable and re-insert it into the charging port to see whether the charging light comes on. If not, use a different cable or a different base if you are charging wirelessly.

Step 3: Put AirPod Back in the Charging Case
If the AirPod won’t charge despite ensuring there is adequate power in the charging case, it’s possible that the earpiece is incorrectly positioned in the case and isn’t making the required contact with the charging port.
To fix this, remove any attachments, like foam ear tips, and try reinserting the AirPod to see if the charging icon appears when your AirPods and iPhone are nearby.
If that does not work, you can Clean the AirPod and Charging Case.
Step 4: Clean Airpod and Charging Case
AirPods (3rd generation) and AirPods Pro are sweat and water-resistant but not water and sweat-proof. How frequently you clean your AirPods is determined by how often you use them.
For instance, listening to music occasionally warrants fewer cleaning sessions than AirPods used during gym workouts. Putting off the cleaning only results in a buildup of gunk that can affect the quality of sound produced by your AirPod.
Dirt on the AirPod stem’s charging contacts, inside the charging case, or both are probably the most common reasons why an AirPod stops charging. This inhibits enough electrical charge from passing through. Fortunately, you can fix it with the below approach.
How to Clean Your Airpod Case
- Use a soft, dry, lint-free cloth to clean the case
- If needed, dampen the cloth using isopropyl alcohol and wipe the case (Do not get any liquid into the charging port)
- Use a clean, dry, soft-bristle brush to remove debris from the lightning connector
- Allow the case to dry
How to Clean Your AirPods
- In case of water accumulating on the ear tip, tap the AirPod on a soft, dry, lint-free cloth facing downwards
- Pull off the tips and rinse them with clean water without soap or detergents
- Wipe using a soft, dry, lint-free cloth and ensure it is completely dry before reattaching it to the AirPod
- Align and click the ear tips back on the AirPod
Related Read: Why is One AirPod Louder than the Other?
Do not use heat or compressed air to dry your AirPods.
Step 5: Reset AirPods

Is your right Airpod still not charging? All original Apple AirPods have a reset function that restores factory reset settings and this feature comes in handy.
This can be accomplished by un-pairing and re-pairing your AirPods.
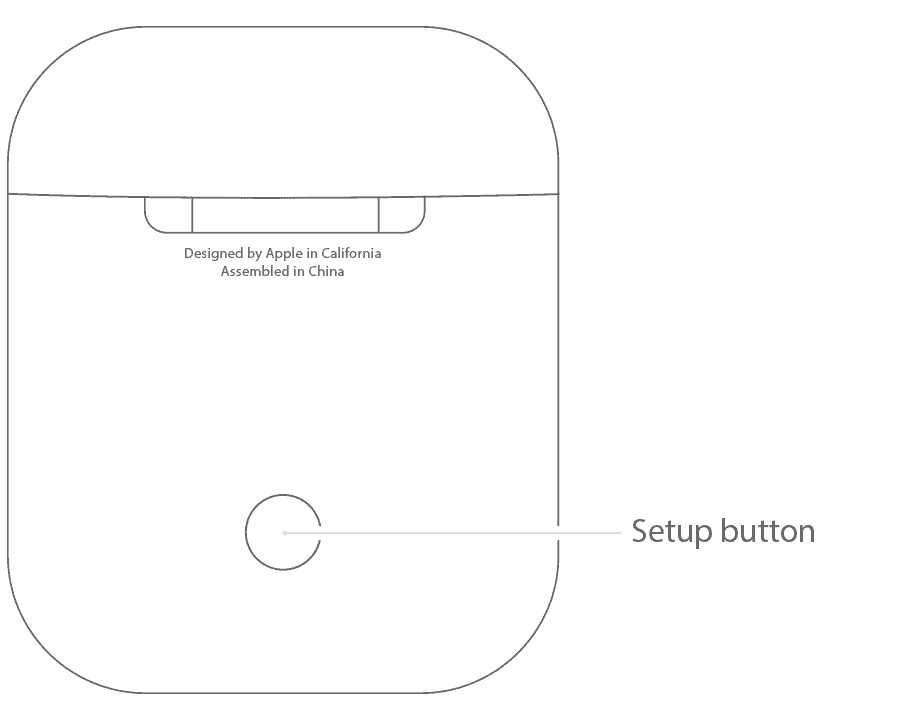
Go to your phone and click on Settings> Bluetooth > click on the I > and Forget Device. Afterward, put the AirPods back into the case and hold down the button. Follow the instructions on your screen to pair the AirPods.
Hard Reset Your AirPods
If that still does not work, you can perform a hard reset by following the unpairing and repairing steps, then hold down the button on the case for 15 seconds until the light goes from amber to white. Let go and follow on-screen instructions.
It is worth noting that once you reset your AirPods, they will not recognize any devices linked to your account. However, once you open the case lid with the AirPods on the inside close to your iPhone, the set-up process will be initiated, and you can pair your AirPods again.
Step 6: Turn Bluetooth On and Off
The issue with your AirPods could be that the audio from your device isn’t reaching your earbuds properly. Resetting your Bluetooth could be your best bet. On your iPhone or iPad, go to Settings> Bluetooth > move the Bluetooth slider to white (off), wait for a few seconds > move it back to green (on).
Restarting your iPhone or iPad or updating your operating system is also worth trying.
Step 7: Contact Apple Support
If none of the suggested fixes above work, it is probably wise to contact Apple Support or make a Genius Bar appointment at the Apple Store. The team can then advise you on whether to replace or repair the unit.
After setting an appointment, you will be required to show the serial number, bring your charging case, proof of purchase, and your original AirPods or original AirPods box to the Apple Store. Your case serial number is at the bottom of the case lid. You can also find it in your phone if your AirPods are connected to the device.
To find it, go to Settings > General > About > AirPods for the serial number.
Also Read: One Airpod Not Charging? We have the causes & solutions!
Pod Swap or Not?
A malfunctioning right AirPod not charging can be frustrating for anyone. This can partially be attributed to the steep $200 starting price tag on the AirPods base model. However, Pod Swap makes this potentially disposable luxury a sustainable product for years to come.
AirPod batteries will inevitably die after a few years. In the event of such an occurrence, you have the option to send your dead battery AirPods in and receive a replacement pair with new batteries.
This process works by placing an order that is shipped out on the same day. After they arrive, you then put your old AirPods into the box without the charging case and send it back. Pod Swap then cleans and replaces the dead batteries and resells them. The process is cheaper and easier than buying new AirPods.
However, this service is only available for the regular Apple AirPods and is not offered by Apple.
Right AirPod Not Charging on Android
As mentioned above, AirPods also work on Android phones; however, they perform better on other Apple products. The troubleshooting process is similar to the fixes highlighted above, with a few adjustments. The Google App Store features an app like AirBattery that can be used to check the status of the battery.
We recommend pairing your AirPods to an Apple device to rule out any issue related to the hardware and ensure your AirPods are up to date.
Final Thoughts
When Apple’s AirPods were first released in 2016, no one could have imagined such a huge success.
After Apple got rid of the 3.5mm headphone jack, other companies followed suit and wrote off Bluetooth headphones.
AirPods have been one of Apple’s most successful accessories since its inception, bringing in a significant portion of the company’s income.
Many companies are still attempting to mimic AirPods, but none have come near to matching their success. The AirPods have become the go-to completely wireless earbud to buy for all types of users, thanks to reliable hardware and software support.
Although AirPods have revolutionized and changed how we consume audio, one or both AirPods can malfunction at any point. In such an occurrence, refer to the solutions highlighted above. Checking your connections, charging your AirPods, and checking the charge status seem to be the quickest fix to right AirPod not charging.
I hope you found this article helpful. Share your thoughts or questions in the comment section below!