Robotic vacuum cleaners, such as Roombas, are a convenient addition to any house because they don’t need you to do extra work to keep your floors clean. Because they’re fully automated, you don’t have to do anything after the initial setup; they’ll remain operational on their own. And if you discover your Roomba not charging, there could be various reasons behind it.
Your Roomba is designed to detect when its battery is running low and go to its charging station and dock itself to charge. If your Roomba is not charging, then there’s something wrong internally as your Roomba did not connect itself to charge, and now you have a deadbeat vacuum cleaner.
As the first response when your Roomba is not charging, you must take a quick look at its charging port and use some rubbing alcohol and a microfiber cloth to clean any dust, hair, or muck buildup from the charging ports. If the cleanup does not help and your Roomba is still not charging, you can try other troubleshooting methods like — changing the battery, resetting Roomba to factory defaults, and more.
This guide will walk you through every probable cause behind your Roomba not charging and how you can fix it.
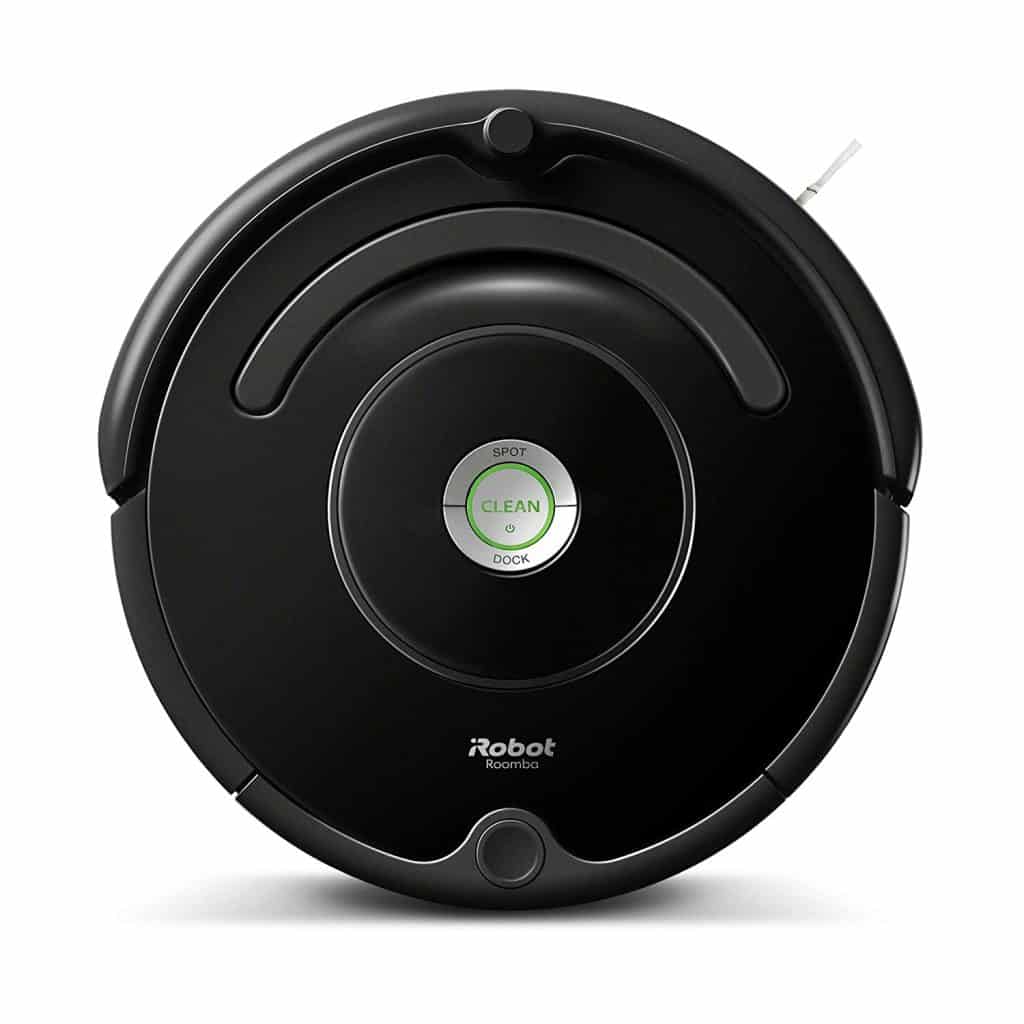
Why is my Roomba Not Charging?
Here are some of the most likely reasons behind your Roomba’s charging problems. Go through them individually to deduce what’s causing your Roomba not to charge.
Dirty charging contacts
Small metal strips, known as contact points, can be found throughout your device. On your Roomba, you’ll find four of them — two at the bottom of the unit and two at the base of the docking station. These metal strips connect your Roomba to the Home base and ensure that your device is charging as the current flows through these strips.
So, if the contact points are covered with filth, dust, or muck, they won’t be able to conduct electricity. As a result, it is essential to clean the contact points thoroughly to ensure effective charging.
You will need a microfiber cloth and rubbing alcohol or – iRobot actually recommends this – a Magic Eraser to clean the contact points.
Make sure you disconnect the device entirely from electrical points before you begin cleaning. Also, don’t use force when cleaning the contact point; be gentle. With rubbing alcohol on a microfiber cloth, you can wipe sticky dirt from your Roomba. Don’t use any other cleaning product as it could harm the metal strips.
Refer to this YouTube video to learn how to clean connect points on your Roomba:
Your Roomba’s contact points constantly come in contact with dirt and dust. As a result, regular cleaning is critical to avoiding charging issues in your Roomba.
Faulty battery
It goes without saying that the Roomba’s battery always needs to be in excellent condition. The rechargeable Ni-MH (nickel-metal hydride) batteries used in Roombas are precisely designed for this purpose.
The battery in your Roomba should keep a charge for roughly two hours under typical conditions, according to iRobot, the firm that makes the Roomba. It should last for around 400 charging cycles.
Why does the battery malfunction on Roomba
Usually, the Roomba’s battery dies when it gets too old. However, other factors might cause your battery to die early. For example, it’s possible that leaving your Roomba in sunlight for an extended period can damage the battery since Roomba batteries don’t perform well in high temperatures.
If you don’t keep your Roomba’s brushes clean, your battery will wear out faster than expected. Hair and other dirt can build up on the brushes, making the motors which turn the brushes work harder. Your Roomba will then need more power to rotate the brushes, reducing its battery life.
How to fix the battery on your Roomba
Your Roomba’s battery will need to be replaced if it’s fully dead. Thankfully, replacement batteries are easily available from iRobot, and changing the battery is a simple process.
Changing the battery on your Roomba
- First, unscrew the five screws that secure the bottom cover of your Roomba. In addition to the four screws that keep the cover in place, a fifth screw secures the rotating brush.
- After removing the screws from the battery, you may now remove the cover to access the battery. Releasing the two tabs will allow you to remove the battery from its slot.
- Just put in the new batteries and assemble your Roomba, and you’ll be good to go.
Keep your Roomba’s battery in good condition by storing it in a cool, dry area while it’s not in use. Also, remember to do a routine clean-up of the brushes and don’t keep the vacuum idle, as using your Roomba daily prolongs its battery life.
Refer to this video to learn how to change the battery on your Roomba:
Remove the battery pull tab
Roomba’s battery pull tab is standard on several electrical devices out of the box. The objective of this yellow pull tab is to stop the Roomba from switching itself on before it has been purchased and deployed.
When it comes down to it, this isn’t really a failure but rather an oversight on the customers’ part. Before using the Roomba, make sure you remove the Yellow battery tab. This may not be obvious if you’ve never used one before.
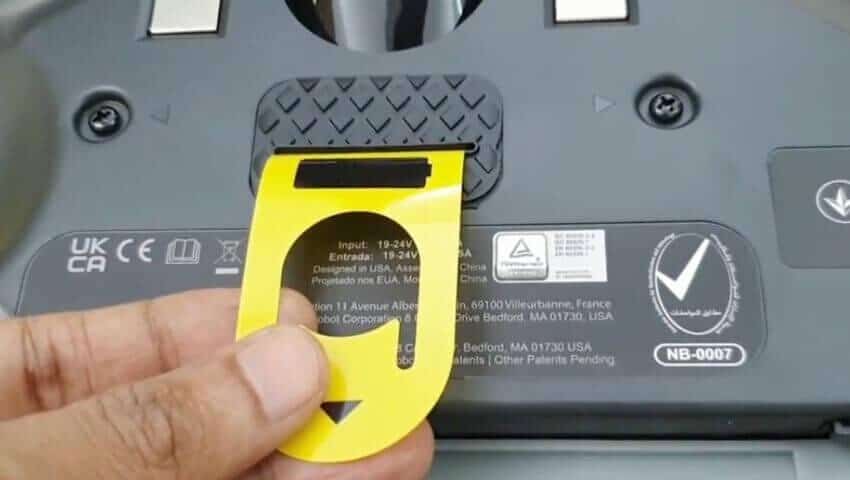
Removing the Yellow tab from your Roomba
- Turn over your Roomba and check if the Yellow tab is still attached
- If it is attached, pull it out immediately
- Once you remove the Yellow tab, switch on your Roomba, and it should work fine
Charging station is not working
The charging station that accompanies your device is essential to recharge your Roomba. Even If you don’t have a charging station, you can still charge your Roomba manually, but it won’t be as efficient.
Even though it is rare, it is possible for a Roomba charging station’s power supply to malfunction on its own. We’ve already mentioned how the charging station’s contact points might be dusty, but it’s also possible that the wall socket isn’t providing enough electricity to the charging station.
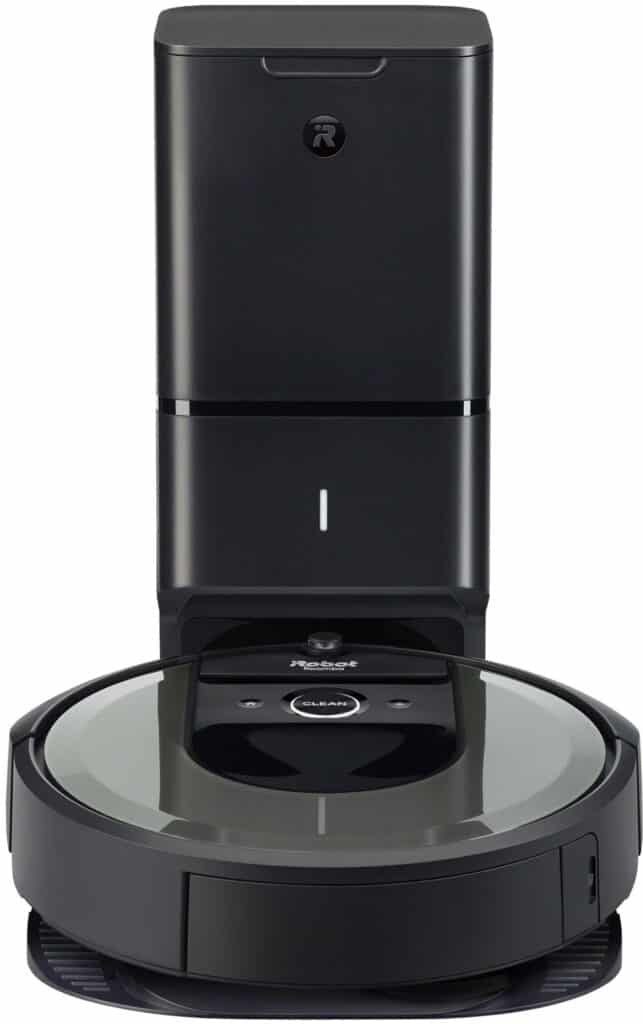
Troubleshooting Roomba Charging Station
- To begin, check whether the issue is with your Roomba’s charging station or the socket where the station is plugged in.
- There lies a possibility that the GFCI outlet might have tripped the circuit breaker attached to that outlet.
- Your Roomba’s charging station should be properly plugged into the outlet.
- If the outlet isn’t the problem, you can try connecting your Roomba straight into the socket using its charging cord.
- Your charging station may be to blame if your Roomba’s battery indicator lights up when you do this.
- Otherwise, you’ll have to get another charging station from iRobot
Temperature issues
If the battery is too hot or too cold, your Roomba won’t operate. Error codes may be shown if your Roomba has shut down because of a temperature hazard. Temperature readings of Code 6 and Code 7 indicate that the battery is either too hot or too cold.
This is more likely to happen if you leave your Roomba in an unusually hot or cold room. Temperature mistakes are unlikely to occur if you keep your Roomba indoors, which is most often the case.
Fixing temperature issues on Roomba
- Just transfer the Roomba to a room with a more reasonable temperature and leave it there for up to 60 minutes to resolve the temperature code problem.
- If you’re experiencing issues because of extreme temperatures, leaving it in a surrounding with moderate temperature will help it cool down.
- If you have the option, try to relocate your charging station to a room with a lower ambient temperature.
Dirty caster wheel
The Roomba’s little front wheel is called a caster wheel. Aside from ensuring the Roomba is suitably lifted, this wheel serves no other function.
The caster wheel well might get blocked with debris over time. The wheel can be pushed beyond its housing when enough junk gets packed in there. That means if you place the Roomba’s caster wheel close to its charging contacts, it elevates it so that it can’t latch onto the charging station’s contacts and charge properly.
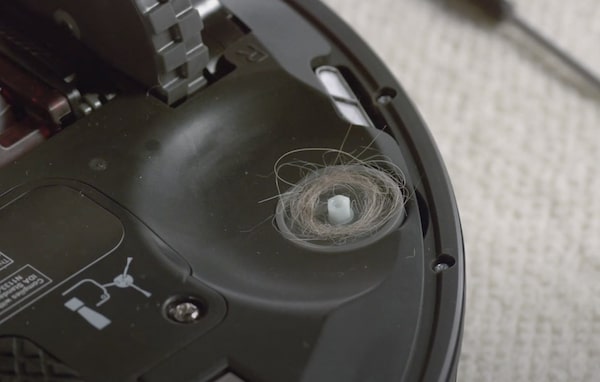
Troubleshooting Roomba’s caster wheel
Fortunately, the caster wheel of a Roomba can be easily removed and cleaned.
- To remove the caster wheel, just grasp the stem that holds it in place, and pull it straight out of the Roomba.
- After removing the wheel, you will have access to the housing. You’ll need to clean out all the accumulated debris from there.
- You should be able to get your Roomba working again if you remove any debris and reconnect the wheel.
Here’s the video you should watch to learn how to clean the caster wheel on your Roomba:
Troubleshooting Steps When Your Roomba Won’t Charge
Here are some of the best troubleshooting methods that will come in handy for your Roomba not charging.
Check the outlet
Before attempting any thorough cleanup or more advanced troubleshooting solutions, you should check out wiring and sockets. You should see a flashing power light when you plug in the Home Base.
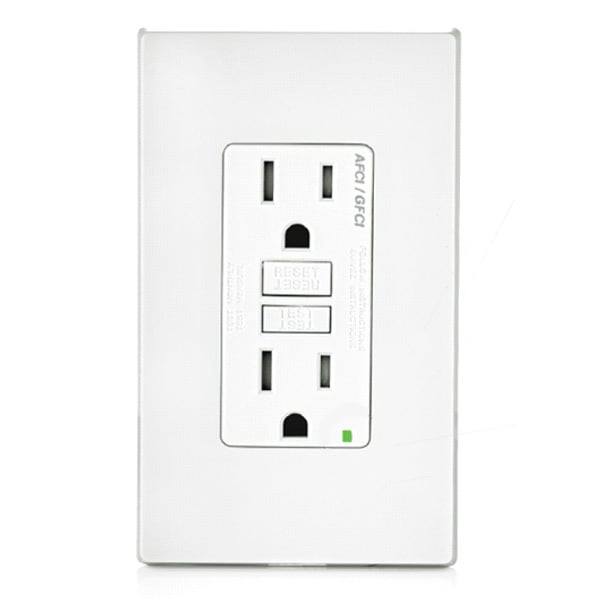
If you do not notice the light, the GFCI outlet may have tripped. Use a new power outlet and tighten the connections when plugging in your Roomba.
Clean docking station
You shouldn’t have to clean your charging dock as much as your vacuum because it doesn’t move about collecting dirt as a vacuum does. However, it will still accumulate debris over time, and this dust might obstruct the sensor window.
Your charging dock has a gleaming glass that wraps around it. Your robot vacuum must be free of dirt to identify and connect with the dock’s sensors.
This cleaning technique does not need to expose the sensors themselves. The sensor glass may be cleaned using a microfiber cloth. If the cloth isn’t getting rid of all the grime, try using rubbing alcohol as a cleaning agent.
Reposition the battery
Batteries can become dislodged or shifted during shipment or other circumstances.
Ensure that the battery is in the correct location before deciding whether or not to replace it or file a warranty claim.
First, remove five screws from the rear panel to access the battery compartment. Next, remove the battery, then put it back and tighten it down firmly. After that, reinstall the screws and connect the Roomba.
Charging Port Contact Springs
The vacuum’s charging contacts attach to the charging dock via two spring-loaded metal pins. If these springs break, you’ll have problems with your vacuum’s dock connection. Even if your Roomba vacuum docks, it will be unable to charge and hold its position without these springs.
Check your metal pins to see whether there are any broken springs. You’ll need to buy a new charging station to fix this problem.
Reboot the Roomba
It’s possible that the issue isn’t hardware-related at all. As a result, there’s a chance that the Roomba won’t show a charge icon because of a software bug.
As a result, the best way to get around the issue is to perform a reboot.
Here’s how you can reboot your Roomba
- First, press and hold the clean and dock buttons on your Roomba
- Wait for the beep and then release the buttons
- After this, re-plug your Roomba and wait for it to restart and show the charging indicator
- If you have a Roomba from the 700 and 800 series, you will have a dedicated reset button to reset the device that you can press and hold for 10 seconds to do a soft reset
Factory reset the Roomba
Up to this point, we’ve attempted to repair your Roomba’s hardware and attachments on our own. This may be a software-related issue rather than a hardware issue.
You won’t lose your cleaning schedules if you factory reset a Roomba, but you might lose device-specific preferences. That’s the key, though, since these device settings might be the reason behind your Roomba not charging.
We have included instructions on factory resetting your Roomba below. After this is complete, a new pairing and Wi-Fi configuration process will be required. Charge your Roomba as you normally would after that.
Now might be a good time to check out our list of the funniest Roomba names if you’re going to have to (unfortunately) give it a name again anyway!
Factory resetting newer Roombas (S series and I series)
- For 20 seconds, press and hold the Clean button.
- Release the button when you notice a circular swirl on your Roomba’s LED indicator, which means that the reset procedure has begun; this light confirms it.
- Your Roomba will restart after the reset is complete. Try charging it after that.
Factory resetting older Roombas (700 series, 800 series, 900 series)
- For 10 seconds, press and hold the Clean button on your Roomba
- Wait for the tone to play, and then release the button. The tone refers to the reset process
- When the tone stops playing, it means the reset process has begun, and your Roomba will restart shortly
Contact Roomba support
Contact Roomba to determine if your vacuum can be repaired or replaced under warranty before purchasing a new one. Be prepared to show them your receipt if they ask for it.
For the most part, you won’t obtain a free replacement unless your Roomba is new and without any visible damage. A brief phone call is all that’s required, though.
Frequently Asked Questions
Here are some related questions about the issue when your Roomba is not charging.
How do I know if my Roomba is charging?
When charging, the newest models of Roomba have no indicator light.
To check if it’s charging, you must click the Clean button once to turn on the light.
• Red: This color means that the battery is fully depleted
• Flashing amber: This means that the charging is in progress
• Green: This means that the charging is complete
How do I know if my Roomba needs a new battery?
One telltale sign that your Roomba needs a new battery is when its battery runs out rapidly, often within minutes of ordinary usage. Another indication is that your Roomba cannot work for even 20 minutes after leaving the docking station. You should also notice if the power light has stopped flashing altogether.
How many years does a Roomba battery last?
Usually, a Roomba’s battery lasts for at least two years after purchase.
Conclusion
We hope this guide helps you know the reason behind your Roomba not charging. A Roomba is a great addition to your home to keep it properly maintained, and it shouldn’t run into any issues as long as you do the occasional cleanup of its connectors, wheels, and charging dock. Nevertheless, if your Roomba is malfunctioning, let us know which troubleshooting method did the trick for you.
Looking for a new robot vacuum cleaner? See how Roomba compares with Eufy: Eufy vs Roomba: Which robovac is better?