Are you having trouble with powering on your Asus laptop? Well, you’re not alone! Although Asus laptops are known for their reliability and durability, they can also face some issues occasionally, like any other electronic device. So, if your Asus laptop won’t turn on, don’t panic. There are a few things you can try to get it up and running again.
In this guide, we’ll walk you through some troubleshooting steps to help you figure out what to do to fix this problem.
Let’s dive in!
Asus Laptop Won’t Turn On? We can help!
If your Asus laptop doesn’t turn on, there are a few possible explanations. First, check to see if your laptop is plugged in and that the power cord is securely connected.
If the laptop is plugged in and still won’t turn on, the next step is to remove the battery and plug in the laptop.
If your laptop still doesn’t turn on, there may be a problem with the power supply or the motherboard. In this case, you can try to troubleshoot the RAM or recover the BIOS.
However, to better understand and be able to successfully solve the problem, our comprehensive guide will walk you through all the troubleshooting steps.
Let’s get started!
Why Won’t My Asus Laptop Turn On?
If your Asus laptop won’t power on, there are several possible causes:
Dead battery
This is the most common reason your Asus laptop won’t turn on. If you’ve been using it regularly, the battery may be simply drained and needs to be recharged. Try plugging it in and see if the charging light comes on.
Loose connection
Another common issue is a loose connection between the power cord and the laptop. Check to ensure the cord is firmly plugged in at both ends and that there’s no damage to the cord or port.
Bad power adapter
If you’re using an aftermarket power adapter, it could be the cause of your problem. Sometimes these adapters don’t provide enough power to charge the laptop properly, so try using the original adapter that came with the laptop.
Overheating
Laptops can overheat if they’re used for long periods or placed in an environment that’s too hot. Another common reason for overheating in laptops is due to external devices that are connected to them. If you think this might be the issue, disconnect all devices and let the laptop cool down for a few minutes before turning it on again.
Hardware issue
If none of the above solutions work, your laptop could have a hardware issue. This is typically something that would need to be diagnosed by a professional, so bring your laptop to a local repair shop or contact Asus customer support for assistance.
Windows update
In some rare cases, a Windows update can cause your Asus laptop to fail the start-up process. If this happens, you’ll need to boot into Safe Mode and roll back the most recent update to fix the problem.
Physical damage
If your Asus laptop is physically damaged, it may stop it from turning on. First, inspect the laptop for any apparent signs of damage, such as cracked screens or loose components. If you find physical damage, you’ll need to take the laptop for professional diagnosis and repair.
How to Fix an Asus Laptop That Won’t Turn On
Now that we know the root causes of this problem, it’s time to elaborate on all the solutions that can help you.
Let’s go step by step.
Step 1: Remove the battery
When it comes to a laptop’s battery, there is one thing we need to make clear at the very beginning. First, see if you have an external (removable) or internal battery. If you’re lucky enough to have an Asus laptop with an external battery, you’ll be able to fix the problem quickly.
Just ensure your laptop is unplugged, and then remove the battery. After that, hold the power button for 60 seconds. Finally, put the battery back, plug the laptop in, and try to turn it on again.
However, if your Asus laptop has an internal battery, follow this procedure:
- Locate the screws – They are usually located on the bottom of the Asus laptop.
- Press them – You may need to use a small tool, like a paperclip, to press them and remove them. That or a screwdriver, if these are traditional screws.
- Now separate the top and bottom parts of the case by using thin plastic objects (for example, credit cards). Don’t use metal objects because you might damage your laptop.
- Remove the battery – After all these steps, you should be able to remove the battery from the Asus laptop.
- Now turn the laptop over and open the screen.
- Press the power button and hold it for 60 seconds.
- Repeat the process in reverse order. Put everything back in place and try to turn on the laptop.
Step 2: Test the charger
The next step you can take if your Asus laptop won’t turn on is to check the charger. Here’s how you do it:
- Turn everything off again and remove the battery.
- After holding the button down for one minute, reinsert the battery.
- At this point, try to turn on the device, but do not connect it to the charger.
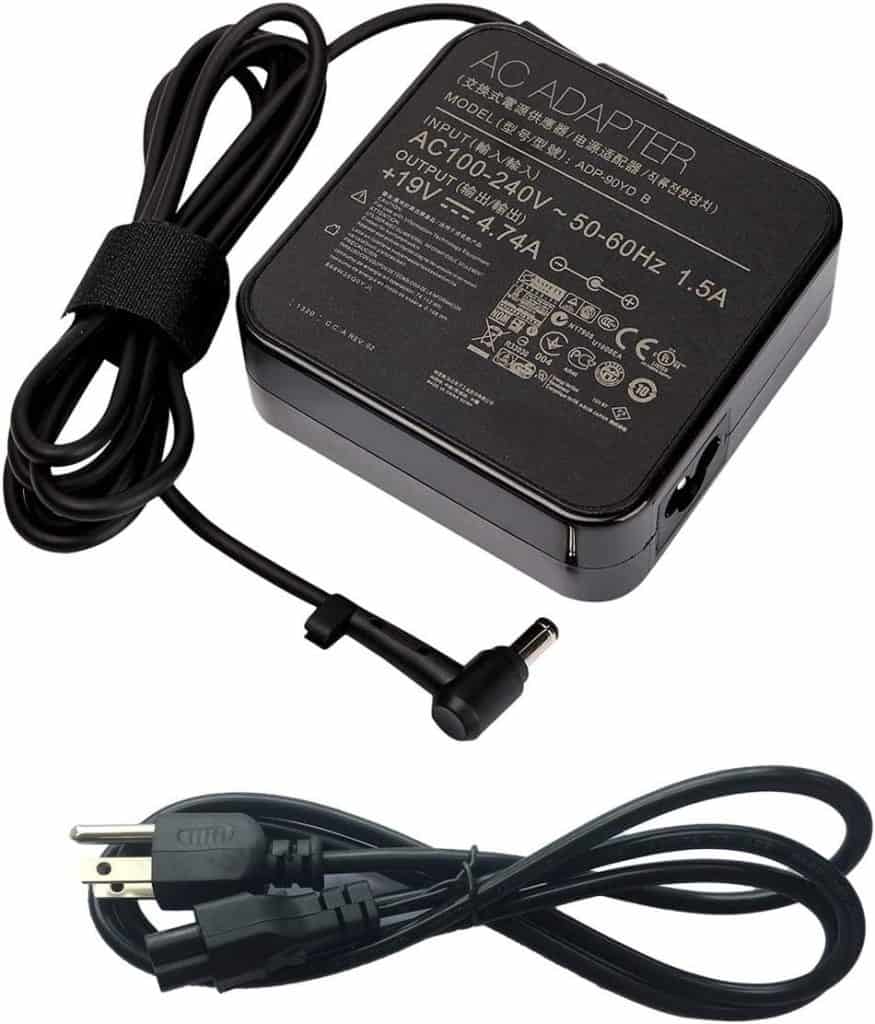
If the laptop turns on, it means that its battery is fine. On the other hand, there is a possibility that the problem is hiding in the charger.
Try connecting the laptop to a different charger to test if this is the real problem. If you don’t have another charger, you can ask someone to lend you one or take a risk and buy a new one. Return periods are your best friend!
Also Read: Best Asus Laptops
Step 3: Battery replacement
Your Asus laptop still won’t turn on? Try this solution.
- First, remove the battery.
- Now hold the power button down for one minute.
- Turn on the charger but do not insert the battery.
- Now try to turn on the laptop.
If you manage to turn on your device, the cause of the problem is a faulty battery.
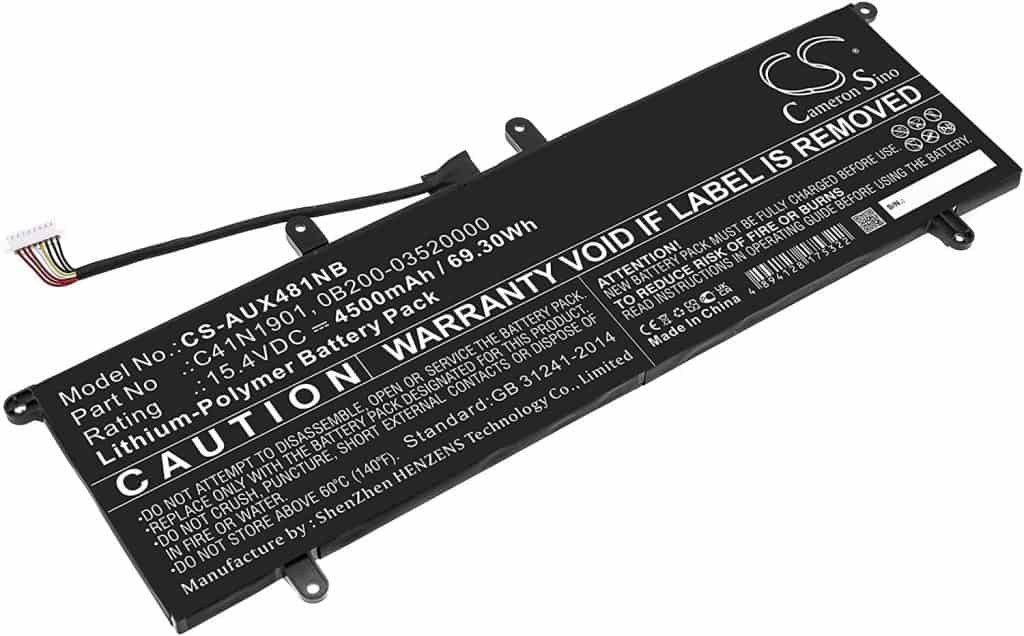
If your Asus laptop battery is damaged or won’t charge, you’ll have to replace it.
Luckily, this is a relatively simple process:
- Start by shutting down your laptop and removing the battery from its compartment.
- Next, insert the new battery and reattach any screws or covers.
- Finally, boot up your laptop and test the new battery using common tasks.
To help you even more with the removal and replacement process, we found a great tutorial – check it out:
Step 4: Troubleshoot the RAM
If your laptop’s RAM is faulty, it will prevent it from turning on. When this happens, you might hear beeping noises or see error messages on the screen. Replacing the faulty RAM stick with a new one should solve the problem.
Here are the main reasons why RAM fails:
- Overheating — When your laptop overheats, it can cause the RAM sticks to expand and contract. This can lead to the loosening of the connection between the RAM sticks and the motherboard, and eventually, the ram sticks will stop working entirely.
- Incorrectly seated — If your ram sticks are not properly seated in their slots on the motherboard, it can cause problems with the signals that they send and receive. This can eventually lead to the RAM sticks being faulty and preventing your laptop from turning on.
- Damaged pins — The pins on the RAM sticks can become damaged over time from use or static electricity.
So, what can you do about it? Check out the below:
Change the order of the RAM sticks
Although it sounds a bit ridiculous, this is the first step you should try, and if you continue reading, you will realize that this makes sense. Your Asus laptop will have issues with powering on if the RAM sticks are unable to connect with its ports correctly.
You can check this as follows:
- Ensure your laptop is completely turned off and that you remove the charger from the socket.
- Check the back of the laptop and remove the screws.
- The next step is to remove the battery compartment cover.
- If the battery is in the way of accessing the RAM, remove that, too.
- Once the case is removed, you will have access to the RAM. Now remove the RAM sticks.
- At this point, reinsert the RAM into the slot.
- Put everything back in place.
- Try turning on the laptop.
Extra tip: Try restarting the laptop after inserting each RAM stick. It might be time-consuming, but it will help.
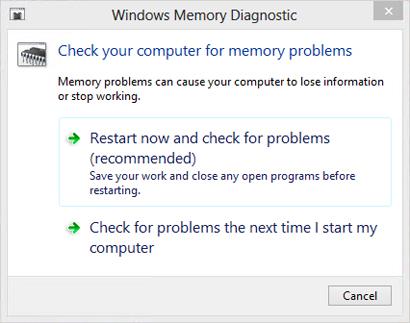
Although you may have successfully solved the problem with the RAM sticks, a double-check is always a good idea. You can do this by using the Windows Memory Diagnostic Tool.
Follow this process:
- Open the Windows Memory Diagnostic Tool by hitting the Start button.
- In the window that pops up, hit “Restart now and “check for problems.”
- Your computer will restart and run a series of tests. Depending on how much RAM you have, this could take a few minutes to half an hour.
- Once the tests are done, you’ll see a results screen. If there were no errors, it will say so here. If there were any errors, they will be listed here, along with information about what kind of error it was.
Step 5: Check the CMOS battery
And if nothing from the above works, here is another useful option to try — remove the CMOS battery and put it back in. Follow this procedure:
- Power off your computer and disconnect all cables.
- Remove the access panel to locate the CMOS battery.
- Gently remove the CMOS battery from its socket.
- Reinsert the CMOS battery into its socket after 15 minutes and put the access panel back.
- Turn on the laptop to see if the problem is solved.
Sometimes this process can be very challenging, especially if your laptop does not allow easy access. In this case, it is better to contact the experts to help you in order not to cause additional damage.
Step 6: Try cleaning the cooling fan.
Sometimes powering on problems occur because the device gets too hot. One of the reasons for heating is the accumulation of excessive dirt. To check if dust is the cause of your problems, the first step is to clean the internal fan.
Take an earbud or a thin cotton cloth that you can soak in isopropyl alcohol. Carefully and gently clean the fan and the exhaust port on the case.
Do not close the laptop immediately. Wait about half an hour for everything to dry completely.
If the problem persists after cleaning, you will most likely need to replace the cooling fan. Another option is to buy an external laptop cooling pad, which can be useful.

Step 7: Recover the BIOS
If you’ve tried the previous steps and none of them have worked, it’s time to try this one. It is possible that your Asus laptop won’t turn because of the BIOS chip or some damage that happened inside of it.
In addition to the problem with turning on the laptop, you can also hear specific sound signals, and on some laptop models, even the keys will light up.
Why does the BIOS firmware become faulty? There are many reasons, the most common of which are a virus, a sudden interruption of the BIOS update, or a failure of the laptop’s flash memory.
Also, keep in mind that the BIOS chip can sometimes fail on its own due to overheating, overvoltage, and random cosmic rays (as weird as this sounds).
Fortunately, there are two ways you can try to repair the BIOS:
Built In Recovery Function
The first step is to check if your Asus laptop has a built-in BIOS recovery function. You will first need to enter the BIOS panel. First, shut down your laptop. After that, you will have to try these three different key combinations.
Important note: Try each of the combinations BEFORE and DURING the powering-on process. One more thing — after each combination is attempted, turn off the laptop again.
These are the combinations you should try:
- Keep the F2 key pressed while turning on the laptop. This is the most common and sure way to get into the BIOS.
- Press Windows or function key with B: ‘fn’ + “B.”
- Press Windows or Fn key with R: ‘fn’ + “R.”
If you’re struggling with it, refer to this Asus guide on getting into your BIOS configuration page.
Recovery with the help of a USB stick
If none of the above key combinations saved your Asus laptop, don’t worry. This may be a crucial step in the right direction.
- Take your USB drive and put it on another computer.
- When you plug it in, format it to “FAT32″ by selecting the USB drive and right-clicking to select Format -> FAT32 (formatting will cause all files on the USB to be lost).
- Now go to the Asus Download Center and find the model of your laptop (it is usually written on the label on the back).
- Type the model number and complete the action by pressing the Enter key.
- Click on Drivers & Utility, which you will see on the right side. Then select “OS“.
- Scroll down and download the latest BIOS version.
- When the file is downloaded, enter it and accept all changes by selecting the ‘Yes’ button.
- Now select the Create Recovery USB flash drive option and proceed to Next.
- At this point, you should see a newly formed USB drive, which you should select and click Next again to copy the BIOS recovery files to your USB.
- After loading, select Finish and then Cancel.
- Remove the USB from your computer and insert it into your TURNED OFF Asus laptop.
- Then turn on the laptop and try the key combinations we listed above by holding them down for at least ten seconds.
- You should now see the BIOS Update window.
- Next, the laptop should start.
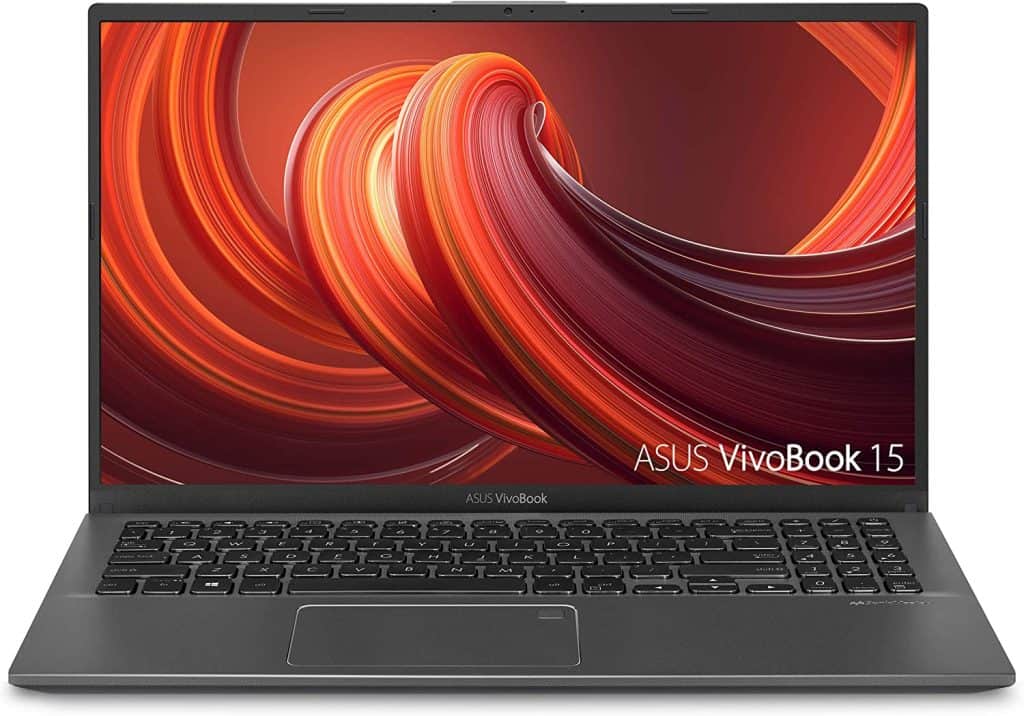
That’s it; your Asus laptop should be working now! And if not, check out our recommended model below.
Also Read: What is BIOS Flashback? A How-To Guide
Conclusion
And that’s it, dear readers! We covered all the causes and solutions for your “Asus Laptop won’t turn on” issue.
Have you already tried to fix your laptop in one of these ways? What turned out to be the best solution for you? Share it with us!
Also, if you have any further questions, please leave a comment below, and we will be happy to help. Thank you for reading!